The ‘stop’ is a measurement of exposure, which is used to denote the change in the value of any of the three elements of the exposure triangle. As we all know, the exposure is controlled by aperture, shutter speed and ISO sensitivity and this is the reason why these three form the exposure triangle.
Though it may sound really complicated, but trust me once you understand the basics of it you shall be well versed with the term ‘stop’. All you need to understand is that a stop is related to the change in the exposure value, so be it because of shutter speed, aperture value or the ISO value.
Increasing the exposure by one stop means that you are allowing double the amount of light to enter the camera. Similarly, decreasing the exposure by one stop means that you are letting in half the amount of light.
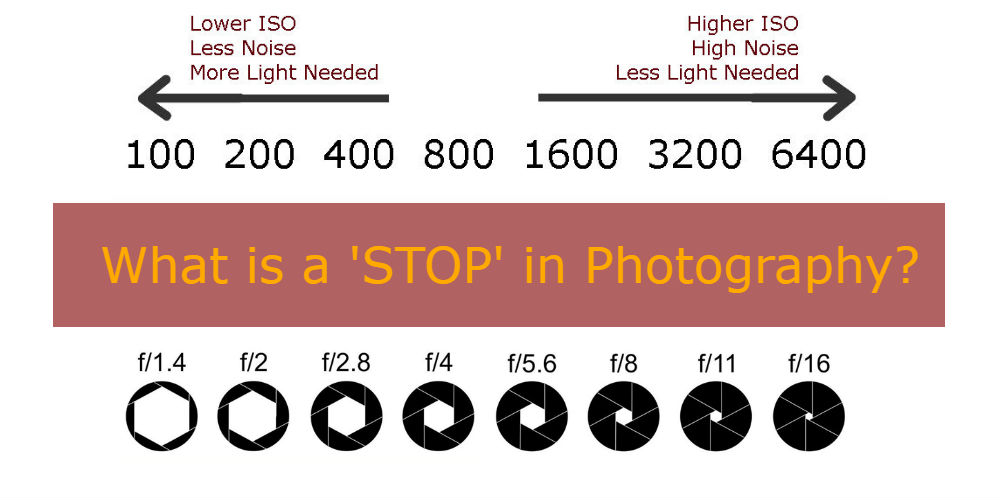
Stops in ISO
Starting with the most easy element of exposure triangle, ISO is the sensitivity on the camera image sensor. The higher the ISO number the more the sensor would be to the light, and the less the ISO value the less sensitive the sensor would be.
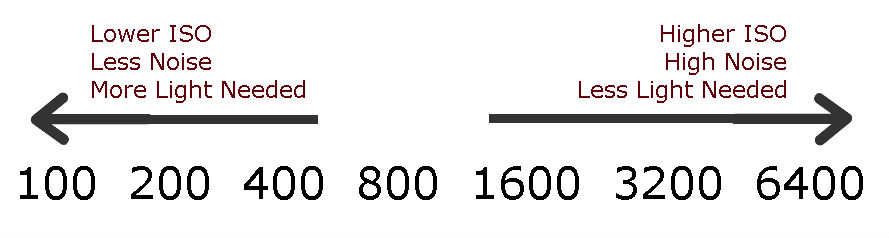
As we double the ISO number, let’s say from ISO 100 to ISO 200, the sensitivity of the image sensor increases by two times and thus increasing the exposure by 1 stop. In the similar manner, as we go from ISO 100 to ISO 400 the sensitivity increases by four times and resulting in exposure increasing by 2 stops.
Now as we half the ISO number, let’s say from ISO 800 to ISO 400, the sensitivity of the image sensor reduced by half and thus reducing the exposure by 1 stop. Similarly, as we go from ISO 800 to ISO 200 the sensitivity reduces by four times and resulting in decrease of exposure by 2 stops.
Stops in Shutter Speed
Shutter speed as we know is the duration of time for which the shutter remains open to allow the light to enter the camera, and hit the image sensor.
If you slow down the shutter speed from 1 second to 2 second or from 1/500 second to 1/250 second, it means that you are letting in double the amount of light and thus increasing the exposure by 1 stop.
So if you adjust the shutter speed from 1/1000 to 1/500 second it means you have increased the exposure by 1 stop, similarly from 1/1000 to 1/250 second means increase in exposure by 2 stops, 1/1000 to 1/125 second is 3 stops, and so on.
Similarly, if you increase the shutter speed from 2 second to 1 second or from 1/250 to 1/500 you are reducing the amount of light entering the camera by half and thus reducing the exposure by 1 stop.
So if you adjust the shutter speed from 1/100 to 1/200 second it means you have reduced the exposure by 1 stop, similarly from 1/100 to 1/400 second means decrease in exposure by 2 stops, 1/100 to 1/800 second is 3 stops, and so on.
Stops in Aperture
Aperture is the opening of the lens through which the light enters the camera.
The f-stop is inversely proportionate to the opening of the aperture.
- The smaller the f-stop number = the bigger will be the aperture opening = more light will enter the camera
- The higher the f-stop number = the smaller will be the aperture opening = less light will enter the camera
Now let’s have a look at the f-stop chart which demonstrates the f-stop values and how the opening changes as we change the aperture values. From each f-stop number to the next as we go towards right, the light entering reduces by half. Whereas the light entering gets double as we move towards the next f-stop from right to left in the below table.

Now as per the above explanation, as you change the aperture value from f/2.8 to f/4 the aperture opening reduce by half. Thus, the light entering through the lens gets reduced by half and the exposure reduces by 1 stop. Similarly, as you change the aperture value from f/2.8 to f/5.6 the exposure reduces by 2 stops and from f/2.8 to f/8 it changes by 3 stops, and so on.
On the other hand, if you change the aperture value from f/16 to f/11 the aperture opening increases by double. Thus, the light entering through the lens gets doubled and the exposure increases by 1 stop. Similarly, as you change the aperture value from f/16 to f/8 the exposure increases by 2 stops and from f/16 to f/5.6 it changes by 3 stops, and so on.
Conclusion
The term ‘Stop’ in photography is simply used to denote the change in the exposure of a photograph. If you want to reduce or increase the exposure, you can do so by changing one or a mixture of any of the three elements of exposure triangle – Aperture, Shutter Speed and ISO.
To reduce the exposure by 1 stop, you can make the following adjustments:
a) Fasten the shutter speed by 2 times, for example from 2 second to 1 second or from 1/100 second to 1/200 second
b) Reduce the aperture opening by half/increase the aperture number, for example from f/4 to f/5.6 or from f/16 to f/22 (refer to the aperture table shown above)
c) Decrease the ISO value by two times, for example from ISO 200 to ISO 100 or from ISO 3200 to ISO 1600
To increase the exposure by 1 stop, you can make the following adjustments:
a) Slow down the shutter speed by 2 times, for example from 2 second to 4 second or from 1/100 second to 1/50 second
b) Increase the aperture opening by two times/reduce the aperture number, for example from f/4 to f/2.8 or from f/16 to f/11 (refer to the aperture table shown above)
c) Increase the ISO value by two times, for example from ISO 200 to ISO 400 or from ISO 3200 to ISO 6400
How to adjust Stops
Let’s say that you are shooting a portrait by using the following exposure settings to get the correct exposure, 1/100 sec, f/2.8 and ISO 100. Now after clicking a photo you realize that you need more blur effect in the background, thus you change the aperture value from f/2.8 to f/1.4.
This would result in the photo getting over exposed by 2 stops and in order to compensate for the exposure you will have to adjust the shutter speed or the ISO value. As it is always a better choice to adjust the shutter speed, you will have to increase the shutter speed from 1/100 sec to 1/400 sec.
What’s Trending:
TIPS TO CLICK PHOTOS IN LOW LIGHT CONDITIONS WITHOUT USING FLASH
WHAT IS VIGNETTING AND HOW TO REMOVE OR ADD USING ADOBE LIGHTROOM
HIGH SPEED SYNC FLASH – ALL YOU NEED TO KNOW
HOW TO ACHIEVE MAXIMUM BACKGROUND BLUR
GETTING STARTED WITH HDR PHOTOGRAPHY
WHY F/22 DOES NOT PRODUCES SHARPEST LANDSCAPE PHOTOS
7 TIPS TO INCREASE SHARPNESS IN YOUR PHOTOGRAPHS
BACK BUTTON FOCUS: HIDDEN FEATURE TO CLICK SHARP PHOTOS
HOW TO GET CORRECT EXPOSURE USING 18% GRAY CARD
6 SITUATIONS WHEN YOU SHOULD USE MANUAL FOCUS