With the increasing use of visual content on social media platforms such as Facebook and Instagram, many mobile phone users have started taking interest in photography. Nowadays, almost every smartphone comes with a decent quality camera and all you have to do is tap the screen to click a photo.
While clicking photos using your mobile phone camera, you must have encountered situations wherein some part of your photo is either underexposed or overexposed, but to your eyes, the scene looks completely well exposed. This is very much possible and the reason is the limited dynamic range of your mobile phone camera. This situation arises when the dynamic range of the scene is more than that of your mobile phone camera sensor and you need to use the HDR mode to capture high dynamic range in your photo.
What is the Dynamic Range?
Dynamic Range is the difference between the light intensity of the brightest highlights and the darkest shadows. It is measured in terms of Exposure Value (EV) or ‘Stops’.
Scenes that have high contrast, or in simple terms the difference between the highlights and shadows is more have wide dynamic range. Whereas, the scenes that have low contrast, or the difference between the highlights and shadows is less have narrow dynamic range.
Dynamic Range of the scene < Dynamic Range of camera = Highlight to shadow details will be captured in single image
Dynamic Range of the scene > Dynamic Range of camera = Highlight or shadow details will be lost, thus requires multiple frames
One of the ways by which you can increase the dynamic range of the photo is by taking the HDR photography technique approach.

What is HDR Photography?
The term HDR stands for High Dynamic Range. HDR technique is used to get details out of the brightest to the darkest elements included in the scene, which otherwise is almost impossible (if the dynamic range in the scene is more than the dynamic range of your camera). A human eye has a dynamic of nearly 24 stops and that is the reason why we can clearly see the details in the bright highlights as well as the dark shadows together.
HDR photography is a technique in which you can merge multiple photos clicked at different exposure values, and enhance the details in the highlight area as well as shadow area. HDR photography basically increases the dynamic range of the photo and lets you see proper details in the bright highlight area as well as dark shadow area. To know more about HDR photography in detail, click here.
Why click photos using HDR mode on a mobile phone?
At present, the camera sensors featured in mobile phones are not at par with the sensors installed in a DSLR. Thus, the dynamic range of the mobile phone camera sensor is narrow/less and there are more chances of highlights getting blown out or the shadows getting darker in a scene with wide/high dynamic range.
The HDR mode on a mobile phone automatically clicks three consecutive photos of the scene and gives you a single HDR image. What happens inside the camera sensor is that the camera clicks three images each at different exposure value and through the internal process, merges them into one image. These three images are clicked in such a manner that one of them is of normal exposure, one is overexposed and one underexposed.
The overexposed photo is clicked to get details from the dark area, whereas the underexposed photo is clicked to get details from highlight area. The normal exposure photo helps in retaining details of mid-tones. This is how a single HDR image is processed.
When to click photos using HDR mode on a mobile phone?
Do not click photos using the HDR mode in all the situations, it is really important to understand the lighting conditions in your scene before going ahead with HDR approach. As discussed above, we should use HDR mode only when the dynamic range of the scene exceeds the dynamic range of your mobile camera sensor. As per my knowledge, there is no mention of the dynamic range of the camera in specifications by any mobile phone manufacturer.
But you can always get a fair idea by looking at the scene and then clicking a photo using the normal mode. If you feel that your photo is looking details in brighter or darker part of the scene, it is time to use the HDR mode.
Let’s have a look at some situations where you can use the HDR technique:
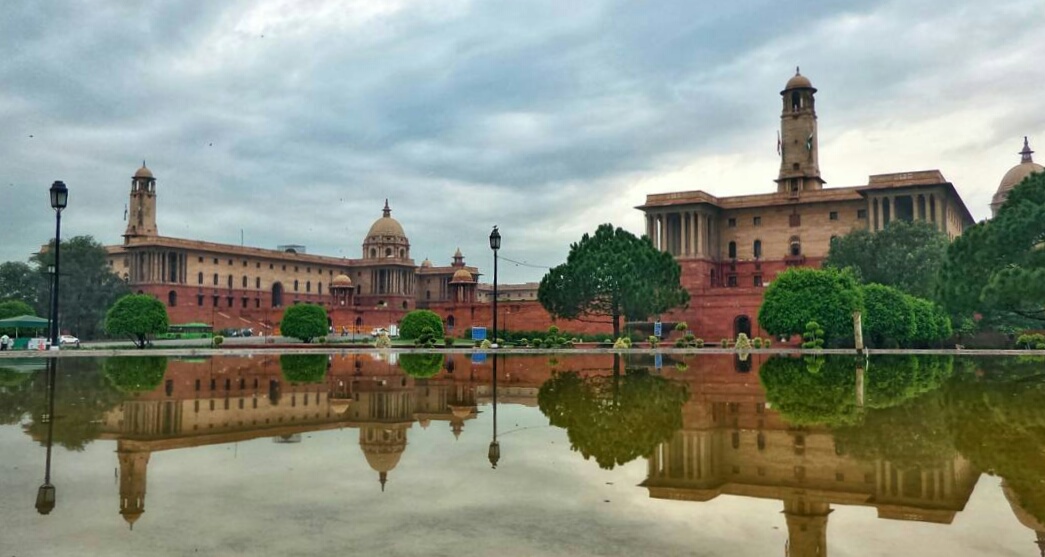
- While clicking landscapes, when you want to correctly expose the green land as well as the lovely clouds in the sky.
- While clicking interiors, there might be bright lights as well as dark shadows. To balance both, you need to click using HDR mode.
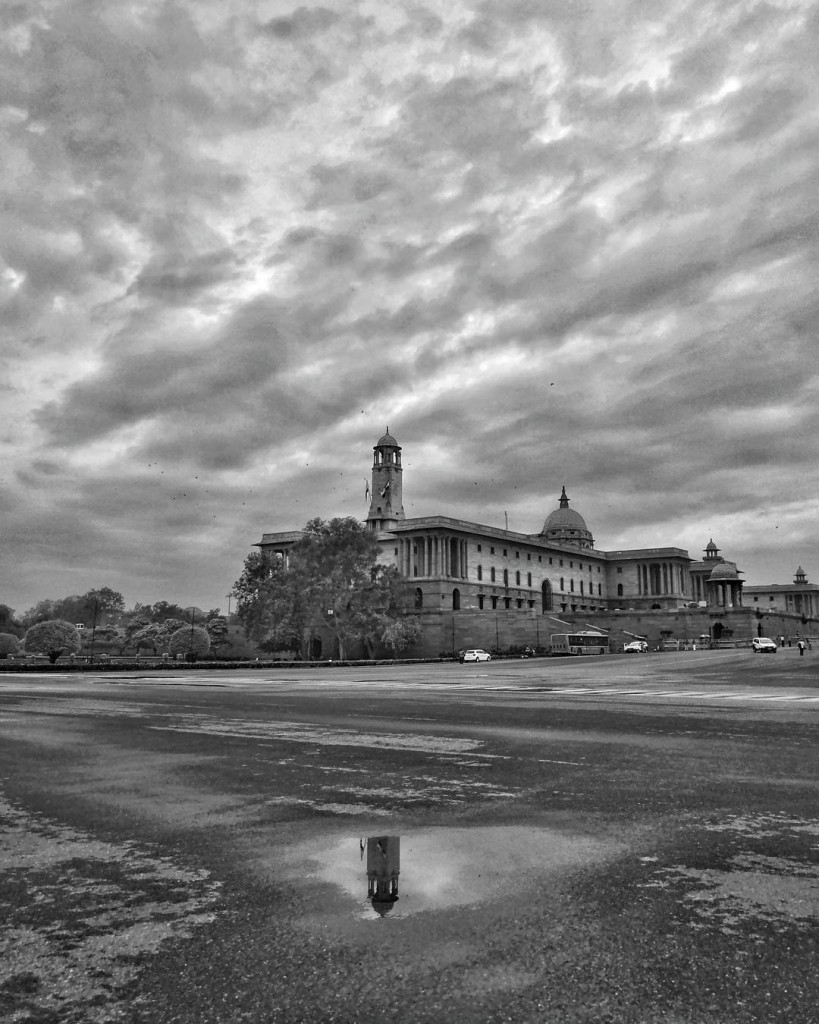
- While clicking buildings or monuments, if you want the structure as well as the sky properly exposed.
- While clicking subjects with backlighting, HDR mode can help you control the highlights in the background and properly exposure the subject.
Here is a perfect example as to when you can use HDR mode.
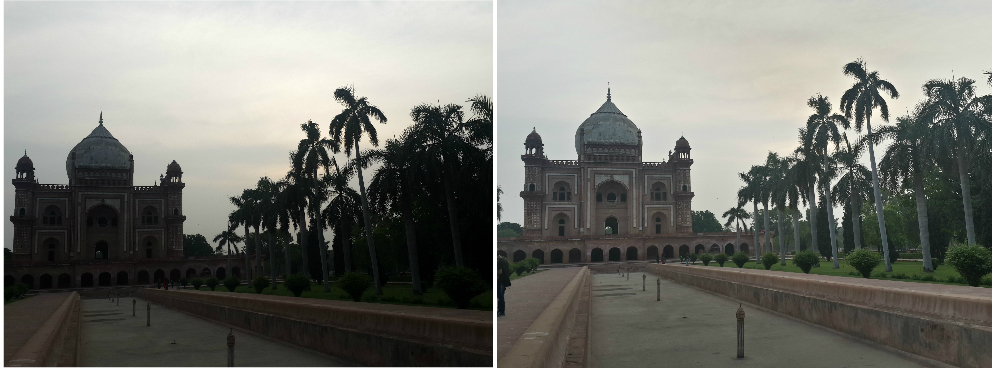
Recently I was at Safdarjung Tomb (a monument in New Delhi), and the sky was full of clouds. I was overjoyed and took out my mobile phone to click the photo on auto mode as shown below (left). As you can see in the photo, the monument is underexposed (dark) whereas the sky is properly exposed. But still I felt that the details in the brightest part of the sky are getting lost.
Then I knew that this was the situation I need to use the HDR mode in order to properly expose the monument as well as capture details in the sky. As you can see in the photo below (right), the monument now appears to be properly exposed and the details in the sky are also well captured in the HDR image.
Things to keep in mind while clicking photos using HDR mode
1. Keep your mobile phone steady:
As we discussed above, your mobile phone camera clicks three consecutive photos of the same scene. This means that there should be no or minimum possible shake produced by your mobile phone. Try and click using HDR mode by keeping your hands steady, or the best approach would be to use a tripod.
2. Avoid including moving subjects in your scene:
As your mobile phone camera is clicking three consecutive photos, a slight motion within the scene would be captured in these photos as well. This would result in ghosting effect (elements captured in motion creating blurry effect).
3. Use the 2-second timer:
Talking about keeping the mobile phone steady, it is more likely to capture shake in the photo when clicking without a timer. As you tap the screen or press the physical button on the phone to click a photo, you will realize that there is a minor shake which is generated during this process. It is better if you activate the 2-second timer on your mobile phone camera to minimize the shake and capture sharp HDR image.
What’s Trending:
GETTING STARTED WITH HDR PHOTOGRAPHY
WHY F/22 DOES NOT PRODUCES SHARPEST LANDSCAPE PHOTOS
7 TIPS TO INCREASE SHARPNESS IN YOUR PHOTOGRAPHS
6 TIPS TO MASTER PANNING PHOTOGRAPHY
EL BOKEH WALL: GET BEAUTIFUL BOKEH USING A FOIL
BACK BUTTON FOCUS: HIDDEN FEATURE TO CLICK SHARP PHOTOS
I like you enthusiastic by gathering people. Teaching them