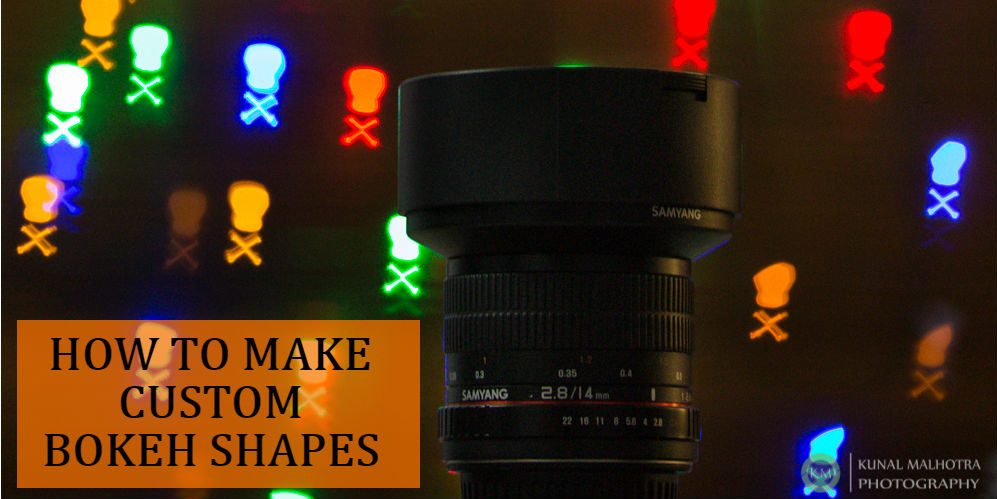
Bokeh, or as we say the quality of out of focus area in the photo is one of the factors we can use to get some creative results in our photos. Using shallow depth of field, you can emphasize on the subject by making the background out of focus. But did you ever try to experiment something different with the bokeh or the area in your photo which is out of focus?
Creating custom bokeh shapes is one of the ways to enhance your photo and try something different using available light source in your background. You can create different bokeh shapes and that too at home without investing any money, as you would already be having the required supplies at your home.

What all you need to make custom bokeh shapes?
Bokeh shapes such as heart shape, diamond shape, star shape, etc can be made using the following supplies:
- Black Paper – as it would not reflect any light through the lens.
- Pencil/Pen – to draw various shaped on the black paper
- Scissors – to cut the black paper as per the shaped drawn
How to make custom bokeh shapes?
Get started by cutting the piece of black paper is such a way that you get a square piece of paper which can fully cover your lens. Then pick up a pen/pencil and draw a shape that you wish to be the custom bokeh shape, make sure it is symmetrical and does not cover more that 30-40% area of the lens diameter. Then fold the paper into half so that you can easily cut symmetrical shape you have drawn using a pair of scissors.

Once you are done with it and have achieved the perfect custom bokeh shape on the piece of paper, all you have to do is place it in front of the lens at the time of clicking photo. Make sure that you position the paper in such a way that it is placed at the centre of the lens.

Camera setting to click photos using custom bokeh shapes
Let’s have a look at the camera settings you need to consider while clicking photos using custom bokeh shapes.
Manual mode/aperture priority:
It is required that you use your camera on either the manual mode or the aperture priority mode as you would need to control the aperture manually. If you use your camera on automatic mode, the camera exposure metering might change the aperture value thus affecting the bokeh effect.
Use aperture wide open:
As you would want the bokeh to be smooth and visible easily, you would require to make the background out of focus by using wide open. This means that you would need a lens which can be used at an aperture value such as f/1.8 or wider such as the 50mm f/1.8 lens. You might not be able to achieve that good results if you the lens aperture opening at f/4 or smaller.

Distance between the subject and the lights:
In order to achieve smooth bokeh effect and the make the background out of focus, you need to make sure that there some distance between the subject and the lighting the background. If you place them too close, you might not be able to achieve smooth bokeh effect. To learn more about factors affecting depth of field, click here.

Use lens on manual focus:
Usually, you would click photos using custom bokeh shaped during the evening/night time, and lighting conditions at the time of the day is low. Your lens might not be able to focus on the subject because of low lighting conditions and would keep hunting for the subject. So the best decision is to switch your lens to manual focus and focus on the subject manually.
I hope that you find this article informative and you got to explore something new to do with your camera. Do share your custom bokeh links/photos in the comments section below.
What’s Trending:
AE-L/AF-L BUTTON IN NIKON DSLR CAMERAS
HOW TO GET CORRECT EXPOSURE USING 18% GRAY CARD
6 SITUATIONS WHEN YOU SHOULD USE MANUAL FOCUS
GETTING STARTED WITH HDR PHOTOGRAPHY
WHY F/22 DOES NOT PRODUCES SHARPEST LANDSCAPE PHOTOS
7 TIPS TO INCREASE SHARPNESS IN YOUR PHOTOGRAPHS