
Have you ever faced a situation when you photograph a high-contrast scene and the moment you look at the LCD screen of your camera you notice that either the highlights are getting blown away or the shadows are too dark? If yes, then HDR technique can be your life savior.
Five years back, when I started with HDR photography technique I used to apply it in each and every photo thinking it would give better results. It was only when I started exploring and researching more about this technique that I realized that there are many factors one needs to consider before going ahead with HDR technique.
An HDR image surely makes your photo look mesmerizing and full of colors, but mastering this technique requires detailed knowledge of the editing software you use to merge multiple frames and edit the output. Before we talk more about HDR photography technique, let us first get to know what Dynamic Range is.
NOTE: this blog post a bit lengthy, but by the time you finish reading it, you will hopefully be well versed in HDR photography.
What is Dynamic Range?
Dynamic Range is the difference between the light intensity of the brightest highlights and the darkest shadows. It is measured in terms of Exposure Value (EV) or ‘Stops’.
Scenes that have high contrast, or in simple terms the difference between the highlights and shadows is more have wide dynamic range. Whereas, the scenes that have low contrast or the difference between the highlights and shadows are less have narrow dynamic range.
As a photographer, you should be aware that there are two dynamic ranges that you must consider. First is the dynamic range of the scene that you will be clicking and the second is the dynamic range of your camera sensor.
Dynamic Range of the scene < Dynamic Range of camera = Highlight to shadow details will be captured in single image
Dynamic Range of the scene > Dynamic Range of camera = Highlight or shadow details will be lost, thus requires multiple frames
The first thing you should search for after reading this blog post is the dynamic range of your camera. It is really important to know how your camera would perform while photographing wide dynamic range scenes.
Assume there is a difference of 12 EV/stops in the highlights and the shadows in the scene that you want to photograph. Suppose the dynamic range of your camera sensor is only 8 EV/stops, this means that your camera can only capture details of highlights and shadows of up to 8 EV/stops. To increase the dynamic range from 8 EV/stops to 12 EV/stops, you will have to click multiple exposures in order to capture details, thus using the HDR photography technique.

What is HDR photography?
The term HDR stands for High Dynamic Range. The HDR technique is used to get details out of the brightest to the darkest elements included in the frame, which otherwise is almost impossible if the contrast is more than the dynamic range of your camera. A human eye has a dynamic of nearly 24 stops and that is the reason why we can clearly see the bright highlights in the sky as well as the dark shadows on the monument together.
A human eye has a dynamic of nearly 24 stops and that is the reason why we can clearly see the bright highlights in the sky as well as the dark shadows on the monument together. Whereas our camera sensor has much less dynamic range compared to our eyes, because of which we end up getting either blown out highlights or dark shadows.
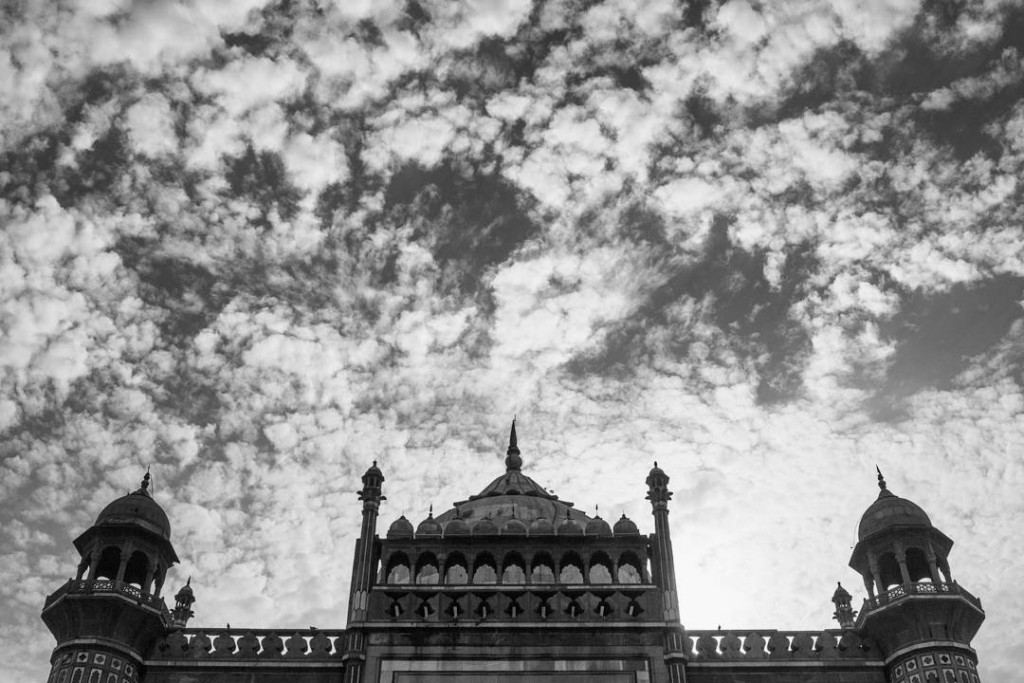
Let’s take an example: when you frame a photo of a monument and the clouds, you can meter for either the clouds or the monument. If you meter for the sky, your photo will have details of the sky but your monument will be underexposed (dark). Similarly, if you meter for the monument, your monument will be well exposed but the sky will be overexposed (white). The reason is that your camera has limited dynamic range and in this scene, the dynamic range between the highlights in the sky and the shadows on the monument is much more than that what your camera is capable of capturing. Because of this, your camera is only able to give you a final image with well-exposed highlights and shadows falling within its dynamic range. If the dynamic range exceeds, then your photo will start losing details either from the highlights or shadows.
When and why to go for HDR photography?
When the scene you wish to photograph exceeds the dynamic range of your camera sensor, the only way out is to increase the dynamic range of the digital image being produced. As this is not possible by clicking one photo, you can increase the dynamic range by taking multiple photos of different exposures and then merging them together using various software. This technique is termed as High Dynamic Range (HDR) photography.
Let’s have a look at some situations where you can use the HDR technique:
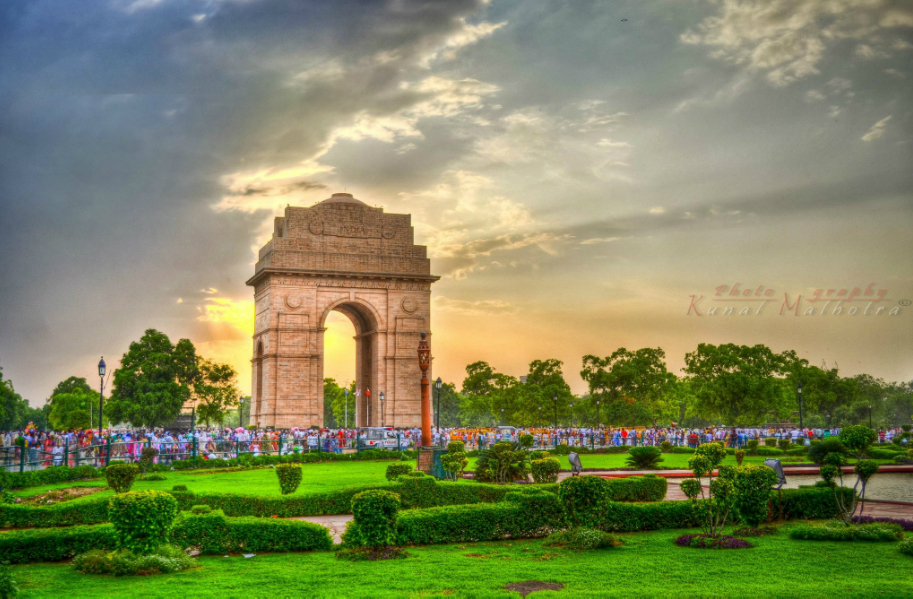
- While clicking landscapes, when you want to correctly expose the green land as well as the lovely clouds in the sky.
- While clicking interiors, there might be bright lights as well as dark shadows. To balance both, you need to click multiple exposures.
- While clicking buildings or monuments, if you want the structure as well as the sky properly exposed.
- While clicking subjects with backlighting HDR technique can help you control the highlights in the background and properly expose the subject.
How to execute HDR photography?
HDR photography is divided into two parts:
- Clicking multiple exposures: There are two methods to click multiple exposures
- Automatic Exposure Bracketing: Mostly all the modern day digital cameras feature Auto Exposure Bracketing (AEB) feature, which allows the camera to take multiple shots at different exposure intervals. Depending on the camera model, you can take 3, 5, 7 or even 9 shots of the same frame at different exposure values and it is all done automatically by your camera.
- Manual Exposures: If you like to control the camera all by yourself, it is better to click multiple exposures manually. This can be done by keeping the aperture value and the ISO constant and then clicking multiple exposures by changing the shutter speed.
2. Stitching multiple exposures together to get HDR image: As we discussed above, in order to capture high dynamic range, you need to click multiple exposures. Next step is to merge these multiple photos into one HDR image using software like Adobe Photoshop and Photomatix. My personal favorite is Photomatix as it allows you to experiment a lot with post processing of the image.

How to determine the number of exposures to be clicked?
The best way is to examine the scene and analyze the dynamic range. The wider the dynamic range, the more would be the number of exposure you must click in order to retain maximum details in the highlights as well as the shadows. Similarly, if the dynamic range is narrow, simply click 3 exposures. With the time and experience, you will get to know whether you need 3, 5 or 9 frames to get an HDR image with the good amount of details.
How to set the camera exposure while clicking the HDR image?
While clicking multiple exposures for an HDR image, make sure you use a constant aperture and ISO value. All you need to do is change the shutter speed and click multiple exposures. White balance can be set as per the ambiance of the scene.
Suppose, your scene consists of a monument and sky full of clouds and sun. To start with, you need to put your camera on ‘spot metering’ and point the camera towards the sky to meter for the highlights (keeping the aperture f/8 and ISO 100), assume it gives you a shutter speed of 1/2000 second. Next, you need to meter for the shadows on the monument and your camera suggests you a shutter speed of 2 seconds.
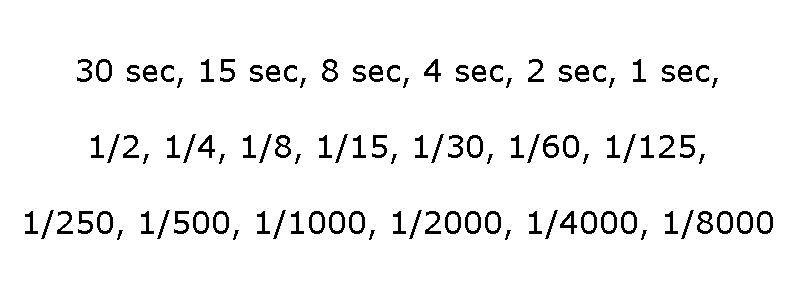
Now that you have meter readings for two shots, you need to find out the metering for the third shot. What I practice is that I take the center value of the fastest and the slowest shutter speed value. In this case, the fastest shutter speed is 1/2000 second and the slowest is 2 seconds. Referring to the table shown above, 1/30 second is the shutter speed lying between 1/2000 second and 2 seconds. Now we have the reading of the third exposure.
1st exposure: f/8, ISO 100, 1/2000 second
2nd exposure: f/8, ISO 100, 1/30 second
3rd exposure: f/8, ISO 100, 2 seconds
To conclude, the first exposure will be as per the metering of the brightest highlight in the scene, the second would be that of the darkest shadow in the scene and the third would be the center exposure value of the first two.
Things to consider while clicking multiple exposures for HDR photography?
Once you have the final exposure readings with you, all you need to do is click multiple shots by changing the shutter speed. But there are some important things that you need to keep in mind as well:
Mount your camera on a tripod:
This is the most basic and important requisite as the tripod eliminated the camera shake while clicking multiple exposures. Also, when you merge multiple files using the software there should be no change in the angle of all the photos. So if you click multiple exposures handheld, there are chances that you might not get good quality HDR image because of change in the angle of all the frames.
Focus and put the lens on manual focus:
To get started, focus on the subject and turn off the automatic focus switch on the lens. This will give you the same focus in all your photos clicked for HDR technique.
Activate 2-second timer:
The moment you press the shutter release button on the camera, it generates a minor shake. By introducing 2-second timer, you can easily eliminate the shake in your photos. The other option can be to use a shutter release remote, but if you do not have access to it, simply use the timer option.
Shoot in RAW format:
I love to shoot in RAW format, and that is the reason I advise you all to do the same. Also by clicking in RAW format, you can increase the dynamic range of your camera by almost 1 EV/stop. Not only that, the RAW file holds much more details as compared to the JPEG file and is useful while merging multiple exposures into one HDR image.
Hope this blog post helped you understand the basics of HDR photography and how to go about it. If you have any doubts, feel free to write them in the comments section.

What’s Trending:
WHY F/22 DOES NOT PRODUCES SHARPEST LANDSCAPE PHOTOS
7 TIPS TO INCREASE SHARPNESS IN YOUR PHOTOGRAPHS
6 TIPS TO MASTER PANNING PHOTOGRAPHY
8 ESSENTIAL MOON PHOTOGRAPHY TIPS
EL BOKEH WALL: GET BEAUTIFUL BOKEH USING A FOIL
BACK BUTTON FOCUS: HIDDEN FEATURE TO CLICK SHARP PHOTOS