What is High Key Photography?
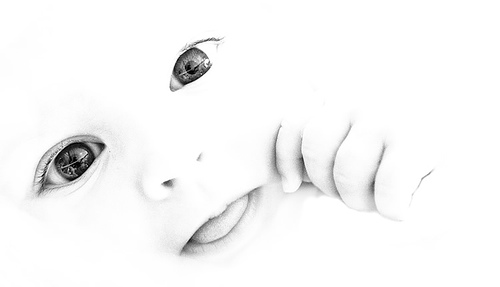
High Key Photography is a technique in which the lighting is used in such a way that the contrast ratio on the subject is low. Contrast of an image is dependent on the lighting ratio of the Key Light and the Fill Light. The higher the lighting ratio, the more will be the contrast in the image and vice-a-versa.
So, when the lighting ratio is low and when the key light and the fill light is almost of the same ratio, then only you can achieve a perfect high key photo.
Image courtesy: Flickr/Anka Nevasilyeva
High key photography technique is used to minimize the shadows on the subject and give it a dreamy look, mostly used in situations where the photographer needs to convey a positive and lighthearted tone and to enhance the beauty of the subject.
Some people may misinterpret the term ‘high key’ as merely overexposing the subject. There might be ways of achieving high key image using post processing methods, but it is always better to capture the high key effect using in-camera techniques.
What is the ideal lighting for High Key Photography?
To get the ideal lighting for high key photography, it is required that you posses at least 3 studio lights or strobes and a white backdrop or a white sheet (wrinkle free).
To get started with setting up the studio environment, mount the white backdrop on the stands and make sure it is rolled down to such a length that it touches the floor. Even if you have a white colored sheet of cloth, you can use it to achieve a good result.
Mark the spot where your model will be positioned and analyze the frame, make sure that your desired frame covers the backdrop without any gaps. If there are any gaps visible, change your frame to fit the backdrop completely.
The next step is to set the key light, which will the main light source falling on your subject. When the subject is illuminated using the key light, it will produce some hard shadows on the other side of the subject. Now is the time to setup the fill light, which is used to eliminate the harsh shadows produced on the subject from the key light. As explained above, try and keep the lighting ratio of the key light and the fill light almost the same to make the lighting on the subject flat.
Once you are done setting up the key light and the fill light on the subject, you will witness that while shooting in this lighting setup the background is coming out to be grey in color and the shadows are visible on it too. This is the time when you add the background light, which will help you eliminate the shadows and the grey color. Your the background light/s pointed towards your backdrop, illuminating your backdrop evenly. Make sure that the light falling on the backdrop is nearly 2 stops brighter than the light falling on your subject, to capture pure white background.
Related Post: Understanding The Light Meter: Incident and Reflected
Image courtesy: Flickr/Raphael Goetter
Note: The lighting technique explained above is not the only way of achieving high key photos. There are multiple ways you can achieve good high key photos, but the technique mentioned above is one of the most efficient and effective method of achieving good high key photos.
If you have clicked some really nice high key photos, please feel free to share the photo or the link in the comments below. 🙂
What’s Trending:
NEWBORN PHOTOSHOOT WITH A PUPPY: MOST ADORABLE THING ON EARTH
THESE 20 PHOTOS WILL MAKE YOU FALL IN LOVE WITH ANIMALS
RUSSIAN PHOTOGRAPHER CLICKS BREATHTAKING AERIAL PHOTOS IN INDIA
BEST AERIAL PHOTOS CLICKED USING A DRONE
7 SECRET SMARTPHONE PHOTOGRAPHY TRICKS – #4 IS UNBELIEVABLE


